Friday, April 10, 2015

Project Complete: Probe 12 Ready to Float Again

The last thing needed to complete the project was to rig and inflate the float bags. Several shots of the finished canoe, ready to go paddling tomorrow.
Inflating the flotation bags with a cheap tire compressor (high pressure, low volume) was taking forever. I switched to a shop-vac (high volume, low pressure), inserting the hose in the exhaust end of the blower and placing the other end hard against the dump valve on the bags. That worked dandy: it took about 7 seconds to inflate each one.  
The float bags are BIG. Somewhat smaller would have been better, but the next smaller size from NRS was too small. 
Don't blame me for giving her a rubdown with Armor All. Nice and shiny, at least compared to when I received her.
I had installed D-ring patches to anchor the inner corners of the float bags. I should have placed them several inches closer to the ends. As it is, the bags intrude into the cockpit, somewhat too close to my personal space.   
I'll have to work on the lacing at the inner ends of the bags (the yellow parachute cord) to better contain them. But that's a minor detail, on the order of normal everyday tweaking that most canoeists are always doing. 
Looks pretty cushy. We'll see how the geometry works on the water.
Here's a summary of the costs:
Canoe             200.00
Skid plate kit             99.99
Kevlar, 5 oz.             33.99
G-Flex 16 oz             54.15
Float bags             239.90
D-Ring patches             43.80
G-Flex Filled, kit             25.77
G-Flex 8 oz.             19.50
Kevlar, 9 oz. twill             44.99
corrugator tool (air roller)             6.53
brushes, spreader             2.63
contact cement             12.61
pop rivets             3.38
bungee             1.59
SS fasteners             6.22
TOTAL             795.05

So I ended up paying roughly what a boat in this final condition would have cost, maybe minus the flotation bags. 

There are a few ways one could bring these costs down. Some items I spent in error on stuff that wasn't needed: the 9 oz. kevlar @ $45; the smaller kit of unfilled G-Flex epoxy @ $20; and the stainless fasteners @ $6.

I bought high-quality urethane-coated nylon flotation bags: I could have cut that cost by about 50% by buying vinyl bags, and that might have been appropriate, given that they cost more than the used canoe. So take off another $100 or so if you wish.

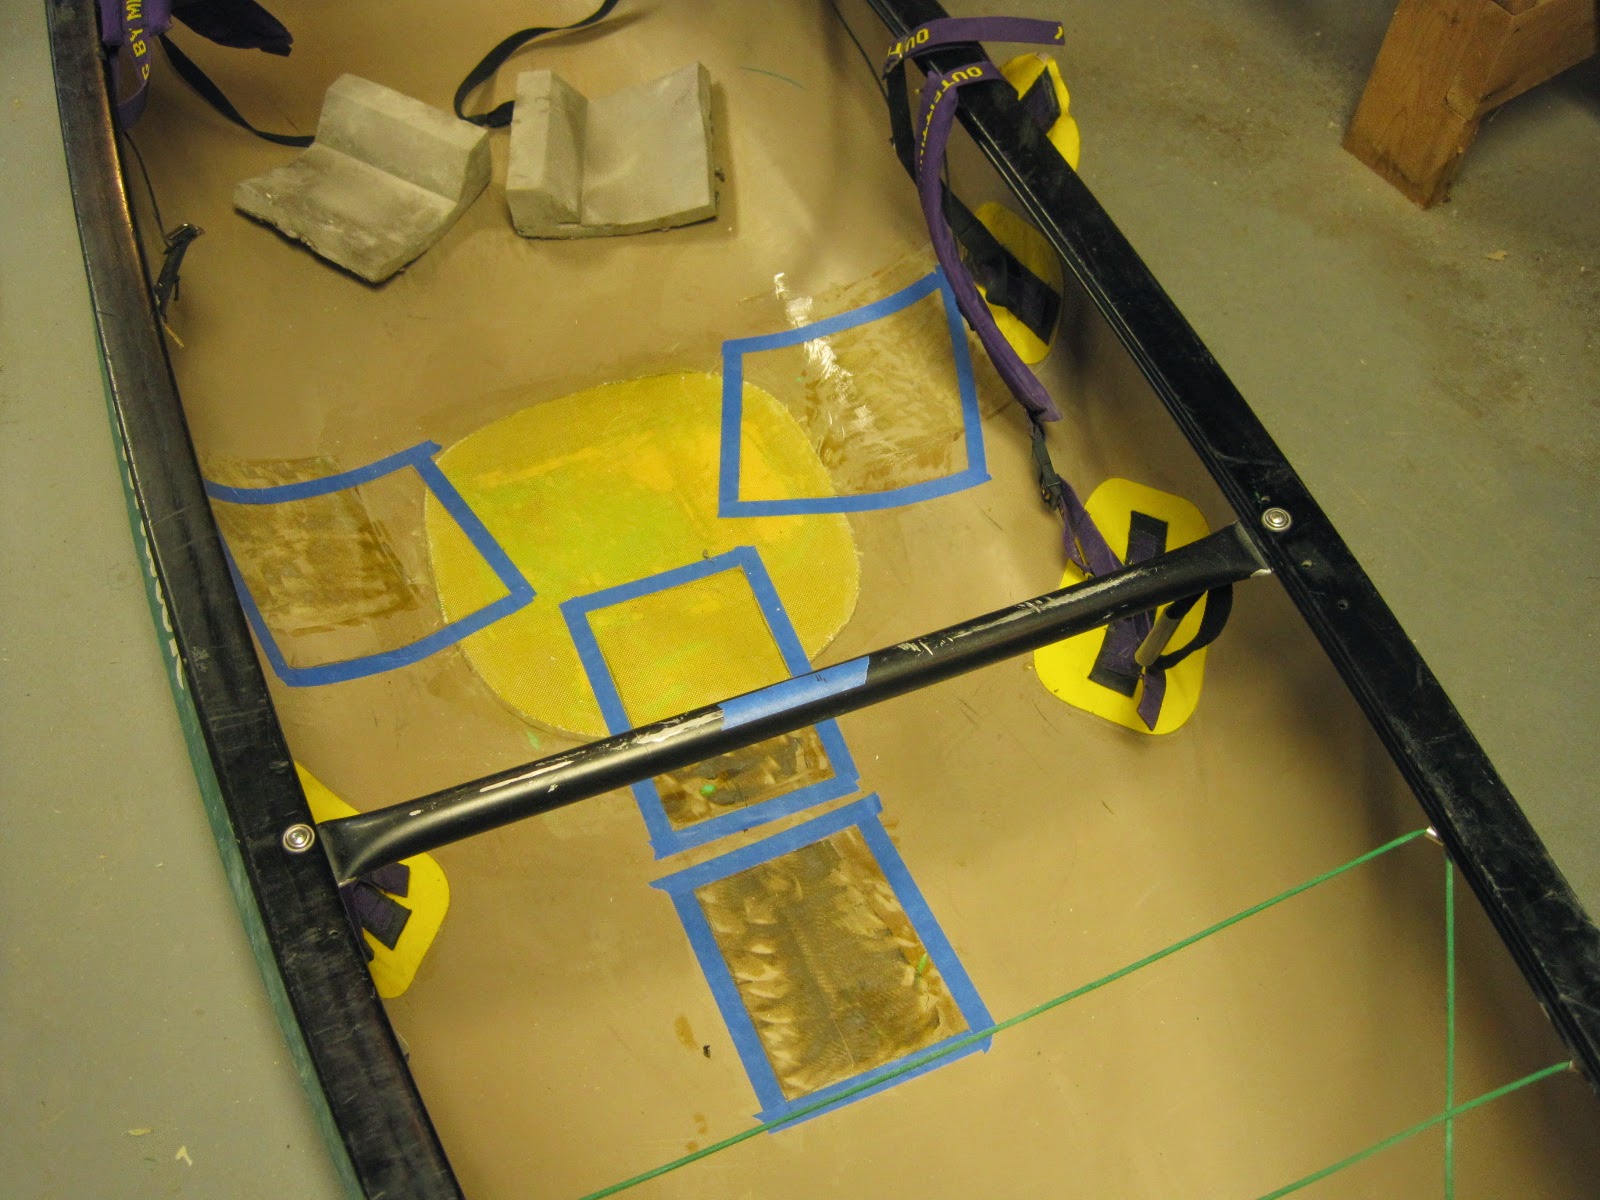
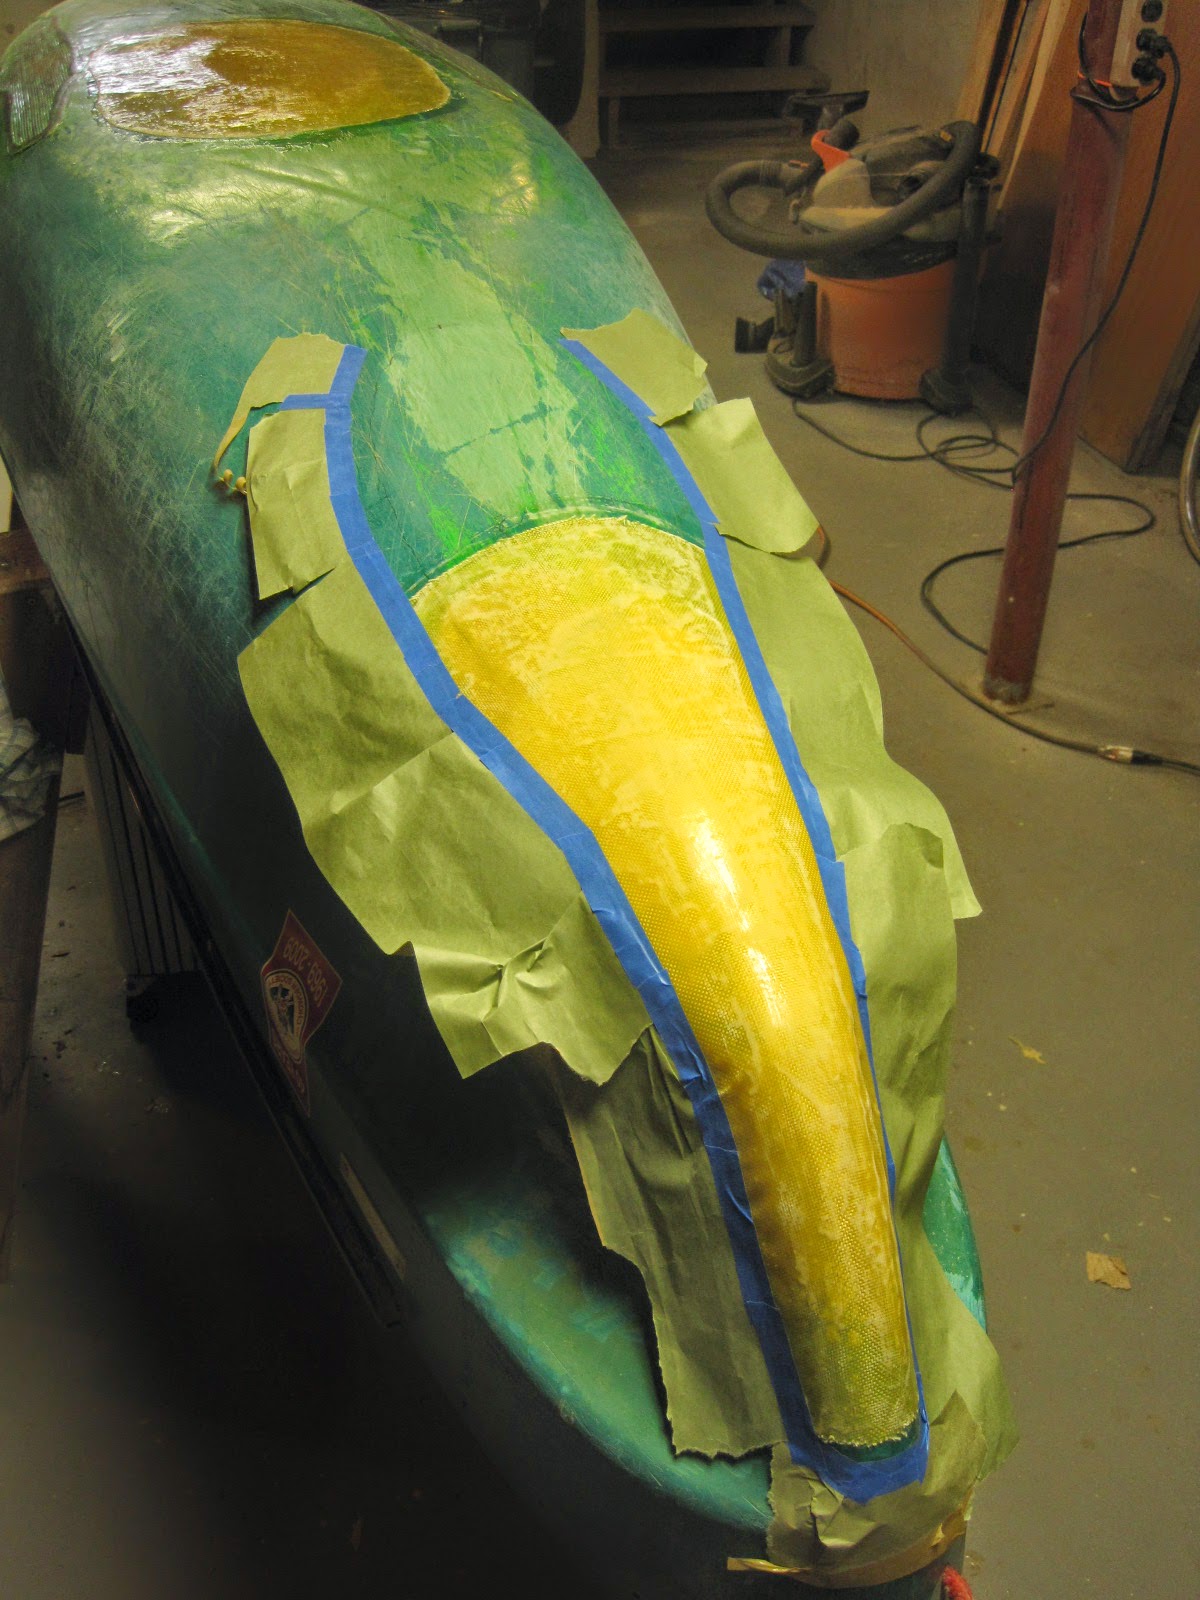
The skid plate on the back was really needed to beef up the hull damage, but the front plate was an improvement, so you could subtract half the cost of the kit (i.e., $50).

With one minor exception, I had all the tools I needed, and several of the consumables (e.g., mineral spirits, colloidal silica, etc.). But I'm not counting those costs. So this project might have been done for about $575, boat included. 

I'm happy with the results. I have, I think, a boat that's worth what I paid for it, and I much enjoyed doing the work. If the outfitting needs to be tweaked, I won't be nearly as hesitant to dive into that project as I would have been had I not done this work. 

And especially now, with Royalex no longer in production, the ability to keep an ABS boat alive at almost any cost is looking like an essential skill for some whitewater canoeists, who will either have to do it themselves, or pay professional rates to others.

Coming up: the final installment of this blog will be an appendix, listing all of the tools and materials used in the project.

Wednesday, April 8, 2015

Putting it Back Together

Time to reassemble everything that was taken out or off.
The aft deck went back on, but only with a lot of prying to force it over the gunwales. Where there was access on both sides, I fastened it in with stainless bolts and nylon-insert locknuts. Where there was no access for a nut on the backside, I used aluminum pop rivets, as per the original installation. 
Contact cement was applied to the hull and to the bottom of the pedestal saddle. After an appropriate wait, the two were mated. Same for the knee pads. When trying to position the double-D-ring patch between the knee pads for the lower anchor of the knee and thigh straps, I found I couldn't get the straps to lay where I wanted them. Two things were needed, the first being to relocate one of the pairs of anchor pads on the sides of the boat (the one at the upper right in the photo). I used a heat gun and putty knife to loosen most the pad, but the area directly under the sewn-on nylon webbing wouldn't come up: I suspect it was fastened in with Aquaseal, which is a urethane and doesn't soften with heat. So holding back the part of the patch that had been loosened, I used a single-edge razor blade to carefully cut through the adhesive beneath the pads.
The other change needed to the outfitting setup was the seat height which, at 10", was too tall for me. This would have been so much easier if the saddle hadn't been glued in, but c'est la vie. Using a variety of knives, saws and rasps, I cut the seat down by more than an inch and reshaped the curve at the back.
After that, everything else went together. The thwart behind the saddle went back in with a bolt and lock-nut at each end. The knee/thigh strap patches were glued in with contact cement, along with four new D-ring patches (the round gray ones) to anchor the corners of the float bags. I also tightened up the lacing to secure the float bags.
All my previous OC-1 paddling had been done with unsuitable paddles. The paddle that I own that's about the right length has a blade that's too small. The one with a good-sized whitewater blade had a shaft that was way too long. So I took the too-long one and cut about 5" out of the shaft. Then I sized a dowel to fit tightly inside the shaft and cut it about 8" long. Slathering it with epoxy, I forced it halfway into the T-grip end, then pushed the lower part of the shaft over it, carefully aligning the T-grip and the blade before setting it to cure.
The finished, shortened paddle. Pictures of the finished canoe in the next post.


Monday, April 6, 2015

Filling Gouges, Prepping to Put Back Together

Major repairs are complete. I did some minor hull touch-ups, then took the first steps toward putting things back together.
All during the epoxying sessions, I'd use any leftover dabs in the mixing cups to fill in major gouges, scratches and dents in the hull. With the last application of epoxy, I mixed a bit extra and added some colloidal silica filler to fill the last of them.
Another long gouge filled: the yellow streak just to left of center. Note also how the edges of the kevlar patch on the bottom amidships (at right) were smoothed over with a final application of unfilled epoxy to encapsulate any sharp fibers.
When all the epoxy was cured, I placed the canoe on the floor and placed the saddle in the bottom. Its location is pretty well defined, because the upper back edge wedges under the center thwart. Sitting on the seat, I placed the knee pads under my knees and moved them around until I found the position I liked best. I then traced around the saddle and the knee pads with pencil onto the hull. Removing all the rubber, I masked the traced areas and lightly sanded inside them. Then I removed the center thwart and placed the canoe back on horses above a space heater in preparation for applying contact cement.

Sunday, April 5, 2015

Installing Skid Plates

With the hole in the stern covered with kevlar, it's time to install the skid plates.


This is the skid plate kit from Harmony: two kevlar felt pads and epoxy are the main items. Also included are sandpaper, stirring stick, sanding foams, gloves, mixing bucket and a brush.
I placed the skid plate on the stern, marked and traced its shape and position in pencil, then lightly sanded the surface within the marks. I masked the area with painter's tape and paper to catch epoxy drips. The same was done at the bow. The yellow you see is the kevlar cloth patch on the stern, not the skid plate, which hasn't been installed yet.
The epoxy was mixed, then about a quarter of it poured onto a long, flat clean piece of corrugated cardboard on which I'd already traced the shape of the skid plate. I spread the epoxy to fill the traced shape, laid the kevlar felt onto it, then used a ridged roller and a plastic spreader to mash the felt into the epoxy. When it had soaked up as much as it could, I poured another quarter of the epoxy onto the top of the felt and worked it in from above. Working quickly, I then placed the saturated felt on the canoe at the stern, and repeated the process for the bow plate.
With both plates laid in position, I used the ridged roller, plastic spreader and brush to press them down, eliminating folds and puckers and forcing out any air trapped beneath. I brushed the last drops of epoxy from the bucket and dabbed it all around the edges of the plates, poking them down with the ends of the bristles to get them to adhere tightly. (I use cheap chip brushes for most epoxy work, cutting the bristles off to about half their length to have a stiffer brush to work with.) The wet felt stretches a bit lengthwise, which is why I didn't mask the "top" end (i.e., toward the middle of the canoe). 
Once the epoxy had begun to set but before it was hard, I pulled off the masking tape and paper. Both ends came out neat. 
One slightly disturbing item: this is the cardboard on which the epoxy was poured and the felt saturated. About halfway along the wet area, you can see a bare rectangular area where the epoxy didn't wet the cardboard. This was an area previously covered by plastic packaging tape. I don't know what became of the tape: did it adhere to the bottom of the felt? Did the epoxy dissolve it? Will either of those possibilities interfere with the adhesion of the skid plate? I don't know.
The bow skid plate after the epoxy had cured.
Close-up of the skid plate after the epoxy dried. It's a fuzzy, nappy finish, which will get smoothed down with use.

Saturday, April 4, 2015

A Laying on of Kevlar

After few days break while I awaiting another order of materials from Jamestown Distributors -- a good source of boat repair supplies -- I applied kevlar fabric to the cover the holes and cracks in the stern and amidships/bottom.
The first kevlar I ordered (top photo) was 9 oz. (per sq. yard) twill weave. This proved to be an expensive mistake. I cut a small square of it for a test, epoxying the kevlar to a piece of plywood, and I found that, due to the heavy weight and the weave, this fabric would require a great deal of epoxy to fill the weave. It's also somewhat stiff and would require a lot of fiddling to get it to lay flat on the canoe's curves. Since I had ordered a cut piece (1 sq. yd), of course I couldn't return it. I ordered a piece of 5 oz. plain weave (photo above), which has a much finer weave and smaller yarns, drapes more freely, and would require less epoxy to fill -- in other words, lower cost and lower final weight.
I made a pattern for the kevlar patch, laying a piece of stiff paper over the area at the stern and roughing out on the paper in pencil the shape and size I wanted. My objectives were to create a pleasing shape with gently curved edges that would cover the holes and the hardened filled-epoxy patch, and give at least 1" overlap all around onto sound plastic. I layed the paper pattern over the kevlar cloth, traced the shape of the pattern with pencil, and cut out the fabric. 
I also traced the shape of the pattern onto the canoe, so that I would know exactly where to place it. I masked off the hull just below the penciled lines to keep drips under control.
The hole in the stern had already been patched with filled G-Flex epoxy. This had hardened with rough spots, ridges from the spreader, and a few hollows. In order that the kevlar lie flat, I applied another moderately thick coat of thickened G-Flex, carefully smoothed it with a plastic spreader, and while it was still wet, brushed it over with liquid epoxy, working carefully so as not to disturb the smooth surface of the filled stuff.
Once I had brushed the liquid G-Flex over the still-wet thickened G-Flex base, I laid the cloth on, aligning it with the penciled guidelines. I then poured a small amount of liquid epoxy over the fabric and used a plastic spreader to spread the epoxy and force it into the weave of the cloth.
Even when wetted out, the kevlar cloth wouldn't drape over the stern stem without puckering, so I cut a dart on each side. You can see this in the photo above. As soon as the epoxy began to set, I pulled off the masking tape and paper so that it wouldn't be glued to the boat.
I followed the same process for the 'midships patch, except: a. since it was relatively smooth, it did not need another coat of filled epoxy before liquid epoxy was brushed on, and b. no masking was needed to control drips, since I was working on a flat surface.
The two kevlar patches with fresh epoxy squeegeed and brushed on.
When the epoxy on the outside was sufficiently hard that it wouldn't sag, I turned the boat over and applied another patch over the midship cracks and holes on the inside, using the same methods. I then tented the whole boat with a plastic tarp, placed an oil-filled electric radiator inside, and allowed the heat to hasten the cure.

Sunday, March 29, 2015

Filling the Voids

I spoke too soon in my previous post when I said that I was finished with grinding and other demolition. A closer examination revealed the need for a bit more deconstruction before I'd be able to start patching things back up. This post covers three sessions of work.
I cut back still more loose, thin material from the stern. Even though there was still material that should have come out, eventually I had to stop in order to maintain the basic shape of the hull. Still, that big gap is a couple of inches long and an inch wide where it goes all the way through, and its full length in the outer surface is about eight inches.
I used a saber saw to open up a couple of cracks in the bottom, amidships, that extended all the way through the hull. Being slightly wider, the crack will now be easier to fill properly with epoxy. I used a chisel to bevel the edges of the crack to increase the surface area for bonding.
Back at the bow again. The hull was warped so that the two sides of the gap didn't line up. I screwed a cleat across the gap to bring them into alignment, placing some plastic packing tape on the underside of the cleat so that epoxy won't stick to it. Then I covered the gap with two layers of waxed paper and taped it into place. I did the same with the cracks amidships.
Here are the materials I'm working with at this stage: West System G-Flex epoxy (in bottles), and G-Flex filled epoxy (tubes), plus colloidal silica as a filler. I've used regular West System epoxy before, but this was my first experience with G-Flex. Even the "liquid" version is very thick and difficult to stir. The filled version is nearly the consistency of a paste.
More materials and tools: latex gloves, paper cups and bowls, mixing sticks, acetone (for cleanup of tools and drips: not for skin). Turns out the G-Flex is too thick to use with the syringes (package at center). Not shown but also important: acid brushes, plastic spreaders, waterless hand cleaner.
I started working with the liquid epoxy, filling the smaller cracks and coating the surfaces of the larger ones. In order to improve flow, I warmed the epoxy in the mixing cup with a heat gun before brushing it on with an acid brush. First I coated the outside of the stern, making sure that the striations from the plastic welding were well-coated. Then I turned the hull over and did the midships cracks from the interior (shown).
I mixed a batch of the filled epoxy but quickly realized that even that was a little too runny for the large gap in the stern, so I added a heaping tablespoon of colloidal silica. It was hard to mix the light, fluffy filler into the stiff paste, but after a lot of stirring, I was able to achieve the consistency of peanut butter. This served nicely when applied with a plastic spreader, and the waxed paper on the outside sufficed to keep it from falling through. Notice the screw heads holding the cleat on the outside of the hull: I tried to avoid getting epoxy on them, to make them easier to remove.
G-Flex has a long cure time even at 70 degrees, and the basement where I'm working is considerably cooler than that, so I set up a tent over the canoe using tarps and insulation board, and placed an oil-filled electric heater (no fire hazard) inside it to hasten the cure.
Three hours later I untented the boat, flipped it over, removed the waxed-paper patches, and filled the gaps and depressions on the outside with filled epoxy, applying it in two layers with a tent-cure in between. This is the midship patch after the second application, now ready for a light sanding and covering with kevlar.
The filled epoxy on the inside was enough to hold the edges of the stern gap in alignment, so I was able to remove the cleat before applying filled epoxy. This photo shows two epoxy applications in place after curing. Although I tried to apply the paste as smoothly and evenly as possible, the hardened surface is (inevitably) somewhat rough. This will all be covered by a fresh layer of kevlar, and then much of it by a skid plate. I won't decide how much of the patch to sand and grind until I've received the skid plate kit. 

Wednesday, March 25, 2015

Grinding is Finished

I completed the demolition phase of the rebuild today, grinding away all the poorly-adhered kevlar and epoxy on the bottom/outside of the hull. 

The two previous grinding sessions were done in the basement, and it created a lot of nasty fluffy kevlar/epoxy dust that could be smelled elsewhere in the house. Today was lovely out, so I brought the sawhorses and boat outdoors and did the grinding there. Much better. Brought the boat back inside for the photos.
Most of the patch is well-adhered to the bottom and remains in place, but a big section had to come off, exposing cracks, caulk and a section of welding.
Close-up of the section that was ground down to "bare" or solid material. Utility knife is for scale.
I also noticed some hairline cracks in the welded sections along the bilges (right by the point of the blade). These cracks will be opened up a bit with a knife and then filled with epoxy.
I ordered a yard of kevlar cloth and small kits (around 8 oz. each) of two different versions of West System G-Flex epoxy (one filled, one liquid). Having finished exposing all the flaws, I think I'll need more epoxy.

Exposing the Stern Damage

In my second work session on the Probe 12 canoe, I removed the knee pads and the stern deck and ground a lot of the Kevlar/epoxy patching from the sterns interior and exterior.
After doing a bit more grinding and examining the extensive cracks in the hull bottom between the knee pads, and noticing its thinness, I determined that I'd have to place a fairly large sheet of kevlar over the area to beef it up. In order to make room for that, I removed the knee pads, using a heat gun and putty knife. They came up without much trouble, then I ground the surface fairly clean and smooth.
Next, I removed the stern deck. This was attached with three stainless bolts and nuts (front/center, and both ends) and a bunch of aluminum pop rivets, which I drilled out. This gave me access to the inside stern. I used a small angle grinder to remove virtually all the kevlar, which was laid into the hull poorly, with many bubbles and gaps. It may have provided structural strength in the stern, but it was doing nothing to keep the water out. It came out easily, but it exposed some large cracks in the Royalex. 
Another view of the stern, after the kevlar was removed.
Then I went to work grinding down the kevlar on the outside of the stern. This was more problematic. Large areas were poorly-adhered, while others were epoxied solidly to the Royalex. I ground out everything that was at all loose. This exposed the black-and-yellow striated area where plastic welding had been done at some time in the past. 
The other (port) side of the stern after grinding. The striations had not been filled with filled epoxy, so the kevlar just sat on top of the striations and was not well-adhered. Everything that was loose was ground off, while some of the surrounding kevlar, although lumpy, was well-adhered. Removing it in order to create a smoother surface would probably create more damage than it would remove, so I smoothed out some of the bigger bumps but did not attempted to remove it. I also ground off most of the bigger epoxy drips.
Close-up of the stern, with a light shining from underneath, shows the extensive cracking and the extreme thinness of the remaining Royalex. This will be the most difficult part of the repair, requiring a lot of filling and fairing to make watertight, strong and smooth.

Monday, March 23, 2015

Diagnosing the Damage


I like things to be inexpensive. I have no desire to show off my means by wearing expensive clothes, driving an expensive car, or using expensive outdoor gear. I favor function over fashion.

As with clothes, cars and gear, so too with boats. I like 'em cheap, and as long as they work, I don't much care what they look like. Since I started paddling solo whitewater open canoe ("OC-1") about two years ago, I've been using a borrowed boat and keeping my eyes open for a really cheap used one.


Looks pretty fair right-side up.
Well, I just found it: an old Mohawk Probe 12: a good boat for a novice whitewater paddler like myself. But it needs a bit of work. Its previous owner is a very accomplished paddler who put this boat through the wringer over many years and many trips, making a number of repairs along the way: some of them well-done, some of them re-done, and some of them strictly expedient. He sold the Probe to me explaining that it now leaks, but the exact location of the leak (or leaks) is unknown. Some of those repairs are going to have to come out and be redone.

So this blog will be a record of bringing a nearly dead Mohawk Probe 12 canoe back to life. This is Day 1.


The bow is in fair shape.
Nicely outfitted too. The pedestal saddle and harness are worth almost what I paid for the boat.
Amidships on the bottom there's big patch of kevlar fabric partially covered with black Gorilla Tape. Both bilges were subjected to plastic welding, leaving the long patches with a striated, stripey-black surface. These appear to be sound and I'm not going to mess with them.
Close-up of the bottom midships patch.
The stern has a big, ugly patch of kevlar and epoxy. Not a bash plate: just a layer or two of fabric. And it's not well-fastened: it's popped and peeling away from the Royalex in places.


Oh oh. The interior at the stern has a sheet of plastic duct-taped in place. Wonder what's under it?

So that's what's under the plastic diaper. A single layer of kevlar, very poorly adhered with epoxy.
Gorilla Tape sticks incredibly hard. It took a heat gun and a putty knife to get it off the bottom patch.
The kevlar patch on the bottom is is bad shape too. Puckered and popped in places. You can see an edge lifting here.
Got the Gorilla Tape off the interior just in front of the pedestal, again with the help of a heat gun and putty knife. There's some funky sealer here covering some cracks or holes. It's "gives" just a little, but it's a lot harder than caulk and it doesn't soften with heat.
Closer look at the white goop just in front of the pedestal. You can see cracks in the Royalex.
Extensive use of heat gun and putty knife sufficed to remove the pedestal and the center patch of the harness that was glued to the hull between the knee pads. Both were stuck down with contact cement, which (thankfully) softens with heat. I then took a small angle grinder to the hardened white goop, and removed the remains of the pedestal rubber. The inside is now pretty clean amidships, although there are visible cracks in the area between the knees. 
The bottom midships patch after grinding with an angle grinder. I ground the edges down until I reached a place where the kevlar was solidly adhered to the ABS. But there's a hole in the middle that exposes the crack through the hull. Not sure if I'll continue grinding away until I reach solid adhesion all the way around (risky), or just fill the hole with a good solid filler and then cover up the hole and the entire previous kevlar patch with another layer of kevlar. 
A closer look at the hole in the bottom patch, exposing some of the weird white filler that was visible on the inside. The black area was plastic-welded a long time ago, evidently before the kevlar and white goop were applied..